How to Make a Denture Using Digital Design
The speaker discusses the process of making a digital denture. They send information to a laboratory where it is digitized and a plan is created for making the denture teeth. The speaker can view and manipulate the denture from different angles to make adjustments. Once everything is approved, the denture is milled by the laboratory.
Traditional Way Of Making Dentures - Part 1
Hey, this is Dr. Mechi. I’m going to giggle. We’re going to go over some steps. I’m sure everybody is realizing that they’ve never thought about how a denture is made, but this is kind of the first step. So what you do is you have a really nice impression. This is made out of a material at the laboratory, and then we take these impressions and this shows where all the this person’s lips and cheeks are, and that’s for the upper jaw. And this is the bottom jaw. This little space right here is where the tongue is, and this is what an impression is.
So after you’ve got this impression, and we’ve done that with our patient in our, what we call our dental operatory, then I actually send this to my laboratory. And what they do is they pour a stone model out of this. You pour some stone in this thing in the impression, and then that sets up. And then you have an exact model that is a very accurate duplication of what the person’s mouth looks like. You do the same thing on the bottom. So this goes in here, the lab sets that sets up in about an hour when you make the stone, and then you’ve got your next step. This is how you make the model.
So once we’ve got this model, this is this patient’s upper jaw, this is the bottom jaw. You have no idea how these are going to come together. You could put ’em in backwards, which would be like this. You could put ’em upside down, you could do all kinds of things. So I have to know how to put these teeth together. So there is close to what the patient has in their mouth. We make this thing called a record base. And this has got some little plastic, and then it’s got this little wax, what we call a wax rim that goes across here that snaps in. We try some things in our patient’s mouth. We mark where the middle of their face is, we mark where their lip and smile is, and then we mark where their canine teeth are. And that helps to identify some of the cosmetic facial structures are. And then this little piece of wax tells you how long to make the teeth.
Traditional Way Of Making Dentures - Part 2
Okay, so this is the next step of using that wax rim of making a denture. So our next step, we have to figure out how do we put the top and bottom teeth together. And we’ve got a same kind of wax little plate here that goes in and it’s got some notches in it here. And then the top has notches. And both of these wax rims have been in the patient’s mouth and we’ve had ’em practice moving. And then we’ve got these little things called bite registration. And these snap into place in the patient’s mouth, but they snap into place. So this snaps in here and this snaps in here. And then the top and bottom snap together. So I know that when I put this together, this person’s jaw is going to look like this. And we’ll show you the next step that involves another piece of material called an articulator.
This little machine is called an articulator. I’ll call him S hanau because that’s the name of this brand of articulator. But if you see these little balls right here, I can move these back and forth. And these have been figured out to be measured to an average size that matches with people’s faces. So if you look at it from the front, here’s one side of your jaw, here’s the other side. And I can move both of these around. And these enable us to mimic how someone’s jaw moves. And it’s kind of like a, I don’t know, kind of almost like a little robot that we can use why we’re not working with the patient. So once we got that articular, I kind of know what that is. How do we attach this denture and the model? The model and the rim to the articular. So there’s this thing called a face bow, and we actually make a recording in the patient’s mouth and this is screwed in here. And we open up this upper arm of the face bow, and that is put in there. And then I’m going to put some stone in between there and that keeps that in place. And we can see how that works.
Traditional Way Of Making Dentures - Part 3
So we’re going to take some of this stone. I’m going to mix some of that up. It’s not what you think it is, it’s just some little plaster. It’s actually pretty cool stuff that’s very accurate. Mix that up and I put a little dob of that plastic plaster right here that goes in here, and I take some and put it on the top of this little thing. Then we mash it down and then I put that in there and you can see how that holds everything together. So the next step, putting the denture together, we use these little things. These are actually bent paperclips and no, I’m not a nine inch nails fan. They just happen to look like that. And then we rest these little things here, and I grab some from Hobby Lobby or Ben Franklin, wherever you get craft stuff. This is just a glue gun and you put this on here, let this dry and this sticks everything together. Pretty cool process. Then I’m going to do the same thing on the other side, and then we’ll show you the next step. So we got everything glued together, we got it screwed back into the articulator. Now what I’m going to do is mix up some of that plaster again, and I’m going to take that plaster,
Going to put some of that plaster as I’m mixing it up here on top of this little model here. And then after I build this up into a nice little patty there, the little bit over here onto this side, I’m going to close this thing together here. So now you’ve got the top and bottom together, and then this sets up in about four to five minutes. And then we will show you the end product of after what all this looks like. So the stone is all set. We’ve got to take all this stuff apart. We’re just going to take off our little Zs off and there’s Zorro on that side for the Z. And then we take this off. Those are these little bite registration things. Then you can see how you put this together, and that is pretty close to about where this individual’s mouth is going to be. And then you can take, I can unscrew these little things back here and my laboratory technician can move the person’s mouth around. And this is a really close adaptation to where his mouth is. So that’s kind of the next step. Next time this is going to be a digital denture.
The Installation Process of Invisalign Trays
Today we’re going to be adding some attachments on Ms. Sam’s teeth here and getting her set to start her Invisalign treatment with her aligners as she’s going to wear, which are a step process every two weeks she will change her aligners. Now we’re going to put some ET here. We are going to et your teeth first here. Next we are going to add some bonding here to those cheap that we just etched. Okay, now we’re about light the blonde. And now we add this flow into the tray to make the attachments. Just some pressure there. Okay, let’s see. Now we should have the attachments bonded on to your teeth and Walla. Voila.
Okay, so just done with Dr. Murie and Denise, putting my attachments on. And so I’m getting ready to put in my first set of trays with NoviSign. So I’ve tried other systems before and I can tell you already that the procedure so far was much smoother. Even my attachments in my mouth are smoother. I can tell they’re not rubbing my lips the way that the other ones were. So I’m going to go ahead and stack my trees in and they’ll fit pretty stuck in the beginning. So just be aware. Snaps right in, fits like a glove, so you can definitely feel indifference when you put ’em in the first time. And it will take a little bit getting used to when you’re talking, but overall very smooth. Feels great for the first visit.
Okay, so I have Sam here and she just started her Invisalign and we have this device here, what is called a munchie. This device helps you to seat your liners along with massaging your gums as well. Now on these munchies, there’s two different little notches on them. So I’m going to show Sam how to use this munchie to help her stimulate her gums to move her teeth. So we have this big notch here for the upper teeth. So what she’s going to do is she’s going to open and around the incisal, she’s going to squeeze. And you’re just going to go around each tooth and bite down, bite, squeeze there, go open, squeeze, open, squeeze and open and cut. And same thing for the lower. We have a little small notch down here on the bottom that she’ll take around and bite down. Open bite, open bite. And you want to do this for top and bottom for at least five minutes. Now, you also too, on the munchie, you have this little notch. It is a little rubber notch that you can use for your canine. So you just bite and squeeze, open, bite, and squeeze.
And this is how we use our munchie and do this once a day. Denise? Yes, you want to do this once a day for five minutes. Top and bottom. Yay. Thanks.
Use of Invisalign
munchies
Hey, this is Dr. Mechi. I want to talk about something we use with Invisalign called Munchies. There’s these little rubber star shaped devices and they help seat your trays, and they keep the teeth moving and they seat the trays so that the teeth move effectively. So Lisa’s going to show you how to use it
Every morning. When I put my trays in, what I immediately do is take the munchie and I have the little end. It has the little hole in it, and I immediately use that on the incisors. So then the next thing I’ll do is go ahead and seat everything else. So for the top teeth, I just go along quickly and it makes everything feel like it’s tighter on my teeth. And then I do the same thing on the bottom. This also relieves pressure when I first put in my new set of trays each week or every other week, so that it kind of relieves that pressure and it makes everything feel like it sets in place easier.
Thank you. This has been a Munchy madness Minute.
Injectable Veneers by Dr. Peter Murchie
Design your smile with Invisalign software
Dr. Mechi from Gland Dentistry explains how Invisalign works. They submit scanners and pictures to Invisalign, which uses a program called ClinCheck to simulate and examine the movement of teeth. Dr. Mechi demonstrates the process on a patient’s upper and lower jaw, showing how each tray moves the teeth about two tenths of a millimeter. The whole process usually involves 18 trays. The simulation reveals that certain teeth will rotate, while others will move up or down. Dr. Mechi thanks Dr. Murie Guch and Dentistry for their support.
Ongoing Invisalign Process Explained by Dr. Murchie
Hey, this is Dr. Murie Gland Dentistry. How are you doing today? We’ve got one of our best Invisalign patients of all time with us, Denise. We’re going to show you what we do when we do an Invisalign check. So the first thing we do is we look and we kind of make sure that the trays are fitting her teeth very nicely, which they are. She’s really doing an excellent, excellent job taking care of things. Her teeth are very clean and she’s been brushing and flossing and the trays fit very well, so I’m very proud of her. Then let me show you over here. This is our software that we use called ClinCheck, and this little bar shows you where Denise started out and she currently is on tray number 10 and you can kind of see how the teeth have moved and I visually use that as a reference to see where she is compared to the original plan. And this over here shows you kind of where we’re going to be at the very end. We’ve got some cool soft little thing we can add here. The blue shows you where her teeth were at the beginning,
And it shows you that we’ve moved some of the teeth there and it moves it forward, and that’s where she is right now. So thank you very much. Have a good day.
Our Hygienist's Invisalign Journey
Hey, this is Dr. Mechi. We’ve got one of our fantastic hygienist, Christine, with us. And when did you start today?
I started in misalign today.
So how was the process? How did it go?
It was very easy process. I tape put my trays on and it was very easy.
What are you expecting in the next week?
I’m expecting to be able to talk very, very well, and I don’t expecting any pain or discomfort. Everything feels great right now.
That’s cool. Well, thank you very much.
Thank you.
Dr. Murchie explains how to care for yourself after having a Dental Implant placed.
This is Dr. Mechi Aland Dentistry. I want to give you some instructions on what to expect after having a dental implant placed. It’s normal to experience soreness around the area of numbing and where the dental implant was placed. Make sure you take your prescribed medications and over the counter vitamin C to help promote healing. Don’t brush and floss in the area of the implant until your follow-up appointment. The first six weeks are critical for proper bone healing for six weeks. Avoid chewing on the implant area and water picking in the area to maximize your healing. Avoid nuts, chips, sticky and spicy foods. And if you have pain or swelling, contact our office or our after hour on call doctor to best receive your care. Thank you.
How To Place Denture Adhesive Before You Get Your Implants
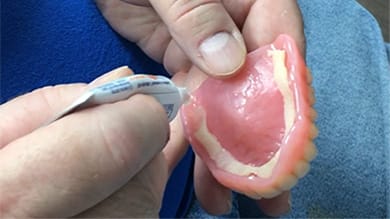
Dr. Murchie: Hey, this is Dr. Murchie. We’ve got one of our patients here, and he wanted to share with you guys the best way to handle denture adhesive. So he’ll show you how to put that in.
Patient: Pretty much just go around the denture with the adhesive, pop it in. Push down everywhere to make sure it’s sealed in there. And then on the top, just go around a little bit. It’s coming out a lot faster than I usually do, but, and then a little bit in the middle. Then push it up in, in there. Bite down, and you’re done.
Dr. Murchie: And that helps, that helps real well when waiting for implants or looking to have implants placed, and it helps stabilize the denture. Thank you very much.
How To Use A Waterpik
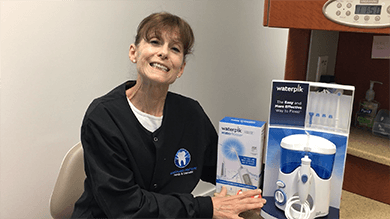
Hi, I’m Kathy Sweet. I’m one of Dr. Murchie’s hygienists. I’m here to talk to you today about water picks. Water picks are great adjuncts to your oral care regimen. What they do is they help to flush out food debris, bacteria from in between your teeth and also underneath the gum line.
These can be used in addition to flossing. Flossing will help, and this will help even more to get your gums stronger and healthier and cleaner. Um, as a hygienist, I can’t tell you that you can’t, that you shouldn’t floss, that you should just use these. But if you’re not flossing, this will make a world of differences. This will help prevent periodontal disease. It will also help to prevent cavities from forming in between your teeth and around your gum lines.
If you’re interested in one, please come to the office. We’d be happy to show you how to use them.
How to brush with an electric toothbrush
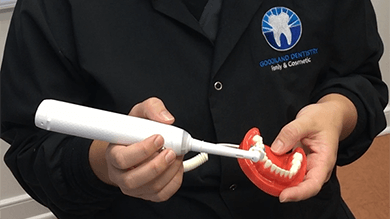
Hi, this is Christine from Goochland Dentistry. I’m here to demonstrate and talk about electric toothbrush.
So what you will do when you’re using the toothbrush is have your circular head over here. You’re gonna turn it on and make sure you’re just putting it along the gum line at a 45 degree angle like so. It’s doing all of the work for you.
And the great things about this electric toothbrush is that it has the built-in pressure sensor so you don’t brush your gums too hard, and it also has a two minute timer so that you know how long to brush your teeth for. Okay, thank you.
Instructions after a tooth removal

Hey, this is Dr. Murchie. I hope you’re doing well. I’m gonna give you some instructions on how to take care of yourself after you’ve had a tooth removed.
One of the first things you want to do is make sure you put, get ice in a Ziploc bag. Hold it on the outside of your face, and that will reduce the swelling.
Follow our instructions on taking Ibuprofen or Tylenol because that will also further the swelling and the inflammation, and it’s very key to be on a very regular schedule of taking the Ibuprofen or Tylenol. If we’ve given you an antibiotic, you want to take that antibiotic and finish it all the way to the end so that the bacteria is removed from your mouth. If you have stitches, they will dissolve over the next seven to 10 days. They may be a little irritating, but just be careful with them.
Do not smoke, don’t drink through a straw, don’t spit, and that will keep you from having a dry socket. If you have any questions, feel free to call me on my cell phone, (804) 363-4513. Thank you so much. Our office number is 8 0 4 7 8 4 4 6 2 4. Bye.
Instructions after a filling
Hey, this is Dr. Murchie at Goochland Dentistry. Hope you’re doing really well today. So you’ve just had a filling done in our office. One of the things to expect after having a filling is expect that you’re gonna be a little bit sore where we gave you the, where we gave you the anesthesia.
Your gums are gonna be a little bit sore where we put the materials to help put the filling in place. And you may have some sensitivity to hot or really hot or really cold foods.
If you notice when you get home that the bite feels like it’s hitting on that tooth, call us right away and we’ll make an adjustment for it, for the tooth. And I don’t think you’re gonna have any problems. If you have any other concerns, give us a call. Thank you.
Instructions after having a crown done

This is Dr. Murchie. Hope you’re doing well. These are some instructions for what you do after you’ve had a crown done.
So today we’ve shaped your tooth so that it can receive the crown. We’ve taken a digital scan and we’ve sent that to our laboratory to have the crown made. You have a temporary crown in place, and it’s cemented with temporary cement.
The real key thing that’s very important for you to do is make sure you don’t chew on that tooth real hard. Stay away from sticky foods like Tootsie rolls, Twizzlers. Stay away from hard things like almonds, nuts, and just baby it. This is the one time I’m gonna tell you not to floss. Do not floss, cuz the floss will knock the temporary out.
If the temporary does come off. The first thing to do is not panic and take a breather. And an easy thing to do is you can actually use some Elmer’s glue. Put it on the inside of the cement, the temp, the crown, put it in place and let it sit for about five or six minutes and it’ll hold it in place. Elmer’s glue is non-toxic. Every kindergartner in the world eats it so it’s not gonna hurt you. If you have any questions though, immediately call us (804) 784-4624. Thanks a lot.
MI Paste
Hey y’all, this is Sam, one of the hygienists here at Goochland Dentistry. I wanna talk to you this morning about a couple of products that we have here called MI Paste and MI Paste Plus. These products are great for generalized sensitivity or before and after tooth whitening, and we have them here available for purchase all the time, and we’d be happy to share more with you.
First I’m gonna tell you just about the MI Paste. The MI Paste is great for our patients that just typically wanna stay away from any products that have fluoride in them. This actually does not contain fluoride. The MI Paste products have a special ingredient in them called Recaldent, and that’s actually a special milk derived protein, and it has the ability to release bioavailable calcium and phosphates into our tooth surface. So there’s no fluoride. There’s just that milk protein, um, called Recaldent. Now, the only contraindication to using this is if you have a true casein milk protein allergy. If you are lactose intolerant, that’s fine. You can still use this product. It is only if you have a true casein allergy to that milk protein. So again, this helps with generalized sensitivity and also sensitivity before and after whitening. Now, for those of you that do not mind the fluoride, we also have this, so this is MI Paste Plus. So this has all the great benefits of the MI Paste plus fluoride.
Okay? So with this, you get all the benefits of that milk derived protein, the Recaldent, plus fluoride. And as we know, fluoride helps with all kinds of stuff. We like to use the term CARD. C stands for cavity reduction. A stands for its antimicrobial. R stands for it helps remineralize the enamel, and D helps, it helps to desensitize the teeth. So a lot of good benefits with both of these. Like I said, just the MI Paste Plus, or excuse me, the MI Paste does not have the fluoride. The plus: it does. So we try to, you know, help cater a little bit to our patients that don’t want the fluoride.
These are not actually toothpastes. We refer to these as more of a tooth cream or a tooth lotion. I know that kind of sounds funny when you’re thinking about it, but you would actually brush your teeth and floss as normal. And then you would apply this just using your finger. You just put a pea size amount on your finger and apply it to the teeth that have the sensitivity.
And just let it sit on there for about three to four minutes undisturbed, and then you just spit out the excess. We do ask that you don’t rinse or swish or anything like that. It’s best to just let it sit on there overnight. We usually recommend that you use it at night for best results. Also it’s a great product to use in custom trays, custom bleaching trays, Invisalign trays or retainers. It’s great to rub it on again with your finger. Put your trays in, go to bed, and it does the magic while you sleep. So we have both of these products in our office at all times.
If you’re interested, ask one of the hygienists about it or the assistants, the MI Paste with just the Recaldent, no fluoride. MI Paste Plus does have the fluoride, and these products are $20. So if you have any questions, just let us know. Otherwise, we look forward to seeing you. Have a great day.
Options to replace teeth

Hey, this is Dr. Murchie. I hope you’re doing really well. I wanted to talk to you today about the three different options that are available to you to replace missing teeth.
So, first off, why would you want to have a tooth replaced? Well, if you miss it, you are missing a tooth, the teeth on either side of this missing tooth will start shifting and they’ll get crowded and then your bite won’t work together. So you can’t chew well. So the other, and that is generally on the back teeth. On the front teeth, you just don’t want to have a missing tooth cuz you can’t smile, you can’t take great Instagram pictures and you just don’t look good out in public. It’s gonna be harder to make career advances and things like that with your job, and it’ll really affect your love life.
So to replace teeth, there’s three different options. One option is to have something called a partial, which is something that comes in and out of your mouth. You take it out when you, uh, and you clean it every day and it’s, it works, but it’s probably, it’s the most affordable, but it’s also the least comfortable and the least—people enjoy it the least. The other option is to do a dental bridge. So if we’ve got a missing tooth here in the middle, I shape this tooth and I shape this tooth. And then we connect a bridge that goes over top. So you replace the three different, the missing tooth, and then you’re able to chew well with that tooth. The other option is to have something called a dental implant, which, the dental implant is a replacement of the root of the tooth and it’s a little, basically looks like a little screw, that’s placed into your jawbone. That heals for several months and usually about four to six months after the implant is healed, then we put a crown over top of the root or the implant, and then you’ve got a tooth back again. Very simple process and most people are a lot happier with either the dental implants or the bridges. If you’ve got questions about which option would be the best for you, please call our office Goochland Dentistry, (804) 784-4624. Thanks a lot.
Secrets to maintaining teeth over life from a patient
Dr. Murchie: So ma’am, what have been the secrets that you’ve found of taking care of your teeth over time?
Patient: Brushing your teeth at least twice a day. And by all means, floss. I think that is the real secret of having good teeth and taking good care of your teeth.
Dr. Murchie: How long have you been flossing?
Patient: Oh, I would say maybe 10 years at least.
Dr. Murchie: And it’s made a really big difference for you?
Patient: Oh, big difference. Big difference. So I would suggest that, and if possible, do it twice a day. I find that it really, after a while, if you get something in your teeth, you are not gonna be able to go around without getting some flossing done because it will be real annoying to you.
Dr. Murchie: That’s wonderful.
Patient: Mm-hmm.
Dr. Murchie: Okay. Well, thank you so much.
Super floss

Hi, this is Christine from Goochland Dentistry. I’m here to talk about Super Floss Today.
Super Floss is a great tool to floss underneath bridges or around lingual bars. Those that have lingual bars, you know what I’m talking about. It’s with you when you’ve had braces. It is very difficult to floss underneath bridges or those bars.
So what you do is you have this tougher end and you floss it underneath the bridge or the bar. You pull it through till you have the tougher area, and then you pull it through and you floss underneath it, and then you pull it through, like so. It takes a little bit of practice to get through there, but once you do, you will not know how you lived without it. Thank you very much. If you have any questions, you can call our office. Have a great day.
Murchie why he became a dentist

Hey, this is Dr. Murchie, Goochland Dentistry. I wanted to talk about when I first realized I wanted to be a dentist. I, my dad is a dentist, so I kind of grew up with dentistry in my blood. However, I worked for an oral surgeon in Northern Virginia and at that point I really was where I knew that I wanted to help people and I really enjoyed the oral surgery aspect.
And then when I went to dental school, I found out, ooh, there’s more than just taking teeth out. There’s ways to rebuild and replace teeth. And so that was really kind of what pushed me over the edge. However, I think even before that, as a kid I would make model airplanes and build them and that was a lot of fun. I really had, enjoyed making, finishing the product and making things look beautiful. And then I would hang the airplanes all around my room. So I think that’s where the hand skill part joined the ability to help people that got me into dentistry.
Dr. Murchie at elementary school discussing teeth

Dr. Murchie: What causes a cavity?
[kids shout answer]
Dr. Murchie: Bacteria and
[kids shout answer]
Dr. Murchie: All that kind of stuff. Good. So what questions do you guys have? Yes, what’s your question?
Kid: Um, what is the wisdom tooth?
Dr. Murchie: Oh, that’s a very good question. So wisdom tooth comes in when you’re anywhere with most people between 17 and 21. And as your jaw grows, you have more space for the wisdom teeth and the wisdom teeth come in. Right now, a lot of people’s jaws because we don’t eat a lot of rough food, and so, um, a lot of people don’t have space in their mouth for wisdom teeth. So we a lot of times recommend having the wisdom teeth out, would, just before you go to college. What’s your question?
[kid asks question]
Dr. Murchie: Why are teeth white? That’s a question that I don’t have the answer. They just are. Well, it’s the way the light reflects through the crystals, but I don’t know why they’re white as opposed to green, but it’s like, why is the sky blue? I don’t really know why it’s blue, you know, but it’s because they’re, um, it’s because the way the light goes through the crystals. What’s yours?
Kid: Well, um, what gives you a toothache?
Dr. Murchie: Oh, well, when the cavity gets into where the nerve is, the nerve will start feeling it and it sends a message to your brain and that’s what causes the toothache.
Kid: Oh
Dr. Murchie: Yeah. What’s your question?
Kid: Um, my dad says if you drill a hole in your like pulp thing, you’ll have, like, it’ll go to your brain and you’ll go like that or it’ll hurt so much the teacher, like if they have to do a whole energy.
Dr. Murchie: Oh, that’s a good question. Okay. So let’s say sometimes one of my, the ladies who works with, Ms. Gina’s back there, she will have people come in and they’re in so much pain and their face can be really swollen cause they’ve got a real bad infection and it really, really hurts. So what I do to help them is I actually give them a medicine that numbs your teeth and it blocks, that medicine we call an anesthetic. It blocks the nerve fibers from sending stuff to your brain. So you can’t feel anything. It feels almost like you ever had your arm fall asleep after you take it up from a nap or something. It kind of feels like that. And then when you, when you’ve done that, then I take, we take a little drill and we just take out the cavity and I make a little hole in the tooth and then we fill.
Tips to healing well after a tooth removal and socket preservation.
This is Dr. Peter Murchie at Goochland Dentistry. I want to talk to you about healing well after a tooth removal and socket preservation.In the first 24 hours, change the gauze every 30 minutes till the bleeding stops. This usually takes about 8 – 12 hours.
You want to decrease your swelling and inflammation by placing an ice pack on your face where the tooth is removed and alternate 30 minutes on and 30 minutes off with the ice for about 12 hours.
Do not use straws, spit, or smoke, and avoid spicy foods to prevent a dry socket.
Eat cool liquids and soft foods for several days, and avoid popcorn, nuts, and seeds for six weeks.
Drink lots of water.
Take your prescribed medications and follow the medication so that we can help you get through the discomfort and painOther complications occasionally you can have a sore throat and pain when swallowing. That’s not uncommon due to the swollen muscles. This usually resolves in 2 to 3 days.
You can have stiffness in your jaw muscles, which can cause difficulty opening your mouth for several days following surgery; this is also normal.Occasionally you may find that you have little hard objects or chips in your mouth, especially after having a bone graft. If there are little pieces of chips, almost like grains of sand, it is very common; don’t worry about that, as we will check with you in a week when we do our follow-up visit and ensure everything’s okay.If you have any questions, please call us at (804) 784 4624; thank you very much.
how to care for yourself and what to expect after a filling.
This is Dr. Peter Murchie at Goochland Dentistry. We want to talk to you about how to take care of yourself and what to expect after having a filling.
After filling, it is common to experience mild sensitivity to hot, cold, and sweets. This sensitivity usually goes away within a few days, but in some cases, it can last up to six months.
If the sensitivity becomes more severe and throbbing, please call our office, and we will evaluate and see how we can help you.
You also may find some soreness where the injection was given for the numbing. This can be resolved by taking ibuprofen, Tylenol, or over-the-counter pain medications.
Enjoy your fillings, brush your teeth, and we will see you soon. Thank you!
If you have any questions, please call us at (804) 784 4624
What to expect after getting a dental crown.
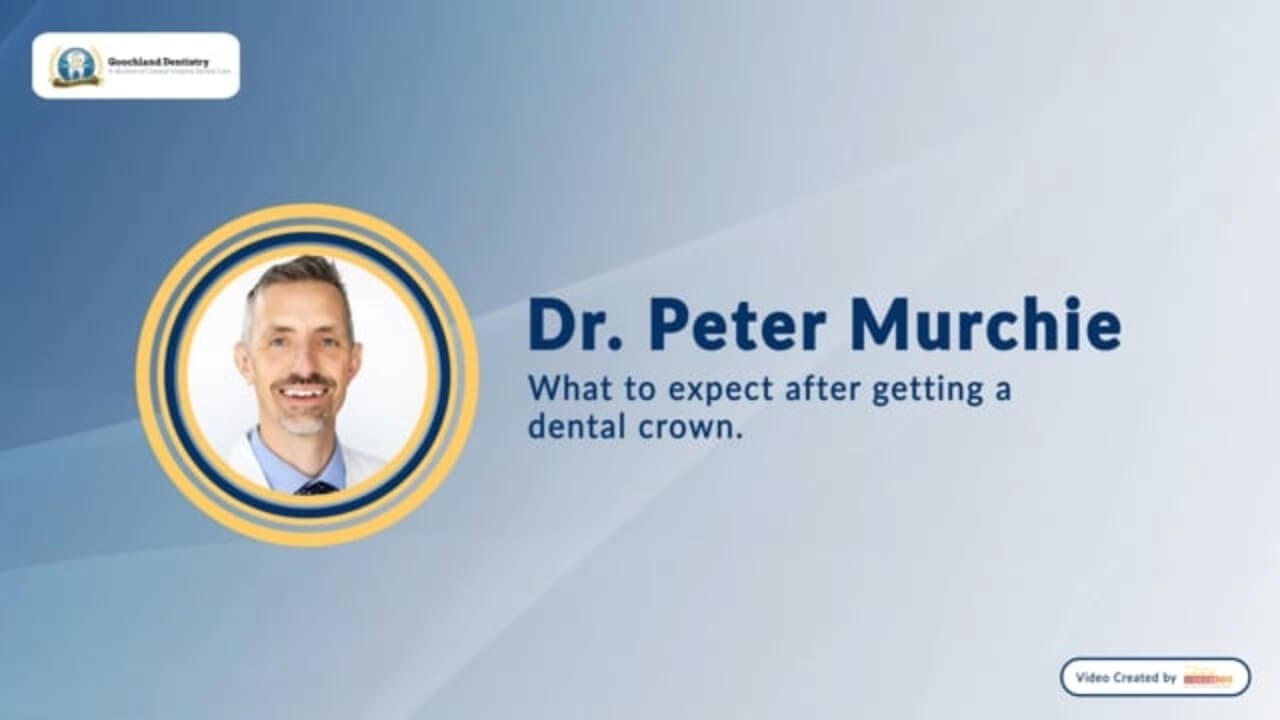
Hey, this is Dr. Peter Murchie at Goochland Dentistry. I want to speak to you about what to expect after having a crown.You may experience some soreness in the area where the numbing was administered, and you also may have sensitivity to hot, cold, and sweet foods, water, and drink.
Your temporary will protect your tooth and enable you to chew, but it’s important that you avoid sticky food and avoid flossing around your temporary.
If your temporary becomes dislodged, clean the underside with a toothpick, fill the temporary with toothpaste, and put the temporary back on your tooth.
Call our office, and we’ll have you come in to recement the tooth and it’s possible we may have your final crown.Give us a call at (804)3634513, thank you!
What is a cavity?
This is Dr. Murchie from Goochland Dentistry. I hope you’re doing well. I, let’s talk to you about what a cavity is. A cavity is an infection of your teeth that’s caused by the bacteria that live in your mouth, that then using the sugar that you put in your mouth makes an acid. That acid sits on the teeth and then eats little holes on the teeth over time. That results in a big hole where you can end up losing the tooth. But that’s basically how fillings start.
There’s a couple of ways that you can prevent cavities. The most obvious and everyone knows is to brush and floss. I also recommend using a water pick. One of the things that the most important thing for prevention of cavities is to have a diet that is low in sugar and sugary foods. Sodas, candies, sweetss, kombucha, all are very acidic, and the bacteria eats. The sugar you put in your mouth turns that into an acid, and then the teeth dissolve. So a low sugar diet, low sodas is by far the base, safest and easiest way to prevent your teeth from having cavities. Thank you.
Whitening Options at Goochland Dentistry.

Hi, I am Dr. Rachele Gillespie from Goochland Dentistry. I’m here to talk about our whitening options here at our office. So if you’re new to whitening and you haven’t tried it before, I highly recommend our to-go Option Trays. These are trays that are preloaded with whitening gel inside. They fit just about everybody’s mouth, and they’re an awesome way to take home whitening to try Today.
If you’re accustomed to whitening and you’re looking for the best option for long-term whitening maintenance, we can make you some custom whitening trays for your mouth. That way you can get some refill gel here at our office, and you can continue to whiten your teeth at home for as long as you’d like. And finally, if you are in a rush to get some brilliantly white teeth before an event, call us and ask us about our in-office whitening, where you can go home with whiter teeth in 90 minutes. So feel free to contact us at Goochland Dentistry for more information about teeth whitening.
Placing Dental Crowns on Dental Implants
This is Dr. Murchie. I hope you’re doing well today. You have been through the process of having your dental implant placed and everything is healed, so now it’s time to actually put the tooth on the dental implant. The first visit for this aspect of it, of making the crown is we have what we call a scanning appointment. So we remove the little healing cap that’s on the implant place, a reference cap that then we use to scan the tooth, or scan the dental implant so that the lab can make the final crown for you. We then send that information to our laboratory.
They manufacture the final crown for you, and you go home with the healing cap in place for about three to four weeks. Our lab then uses their digital technology to manufacture and mill the final crown. When we receive it back from our laboratory, we remove the healing cap, put the final crown in, make sure that your bite looks good, your teeth feel comfortable, and you’re able to chew well. And most importantly, you like the way it looks. Thank you very much.
Are your teeth Sensitive?
Hey, this is Dr.Murchie from Goochland Dentistry . I want to talk to you about sensitive teeth. So I want you to imagine that you’re out with your girlfriends at a frozen yogurt place and chore pump or carry town, and you guys are, you’re smart and savvy. So you’ve made sure that you’ve only filled the cup just enough so you can keep having a conversation with your friends. You guys are talking about your kids, you’re having a great time talking about what you’re doing with your house, those type of things. And all of a sudden you put that nice little thing, a sweet frog, frozen yogurt in your mouth and zinging, oh my goodness, my tooth is killing me. And it goes away in about five, 10 seconds. But boy, that conversation you’re just having, you can’t even remember where you were in the conversation. Why on earth is this happening?
Well, sensitive teeth are caused by the cold substance either in whatever you’re eating, it hits the nerve of your tooth, usually it’s right where the roots of the teeth are and it may causes the nerves to fire. And then that sends a message right to your brain and really causes to be very uncomfortable. When you have sensitivity that lasts about three to five seconds. Generally, that’s where it is on the root of the tooth. If you have sensitivity that lingers more than 15, 20 seconds, that could be a sign that you could be having a large cavity. It could also be the sign of the beginning of a root canal to prevent mild sensitivity. I recommend using a sensitive toothpaste. Those help decrease the risk of the sensitivity. I also recommend having us look at your teeth to make sure the roots of your teeth are covered. We’ve got some procedures we can do to help minimize the sensitivity, and I would also make sure if it lingers longer to call us quickly, you may have a abscess that is developing. Well, thank you very much, Peter Murchie. Goochland Dentistry.
Are you suffering with bleeding gums?

Hey, this is Dr. Murchie from Goochland Dentistry.. I hope you’re doing really well. I want to talk to you about something that’s a very common thing. It’s bleeding gums. The causes of bleeding gums are the bacteria in your mouth that irritate your body, and then your body fights that bacteria off. And the result of this is your gums bleed. It can be caused by not brushing and flossing. It can be caused by certain medications, and it can also be caused by different medical conditions that you may have. The result of be a bleeding gums is that you can have bad breath, you can end up losing your teeth, and then your gums can also be irritated, inflamed. So this is a miserable condition and we want you to get better. So the solution for that is something. The first thing is something you can do it, you’re on your own, which is to brush and floss two times a day. If your gums do not respond after you’re consistently brushing and flossing, we may need to do something called gum therapy where we remove the bacteria that’s in your mouth and get you on a regimen that helps your gums stay healthy. And the goal for your gums is to have them healthy, pink, not bleeding, so that you can smile, speak, and eat. Thank you very much.
NEW 3D PRINTER AT GOOCHLAND DENTISTRY
Hi, my name is Amelia from Goochland Dentistry.. We actually 3D print many of our devices here, including night guards and temporary crowns. How it works is we actually design what we need on our software and we go ahead and send it to our Sprint Ray 3D printer.
So here’s the 3D printer going up and down, and we’re printing the model. You can see it moving. It prints just a little bit layer by layer. And this will give you kind of an idea of how things go here.
So this is a quick example of a night guard that I recently 3D printed. We have our platform and then we have our night guard material here. So how it works is the platform actually dives into the material and it goes in layers, multiple layers, until it finally pours your night guard. So this is our night guard that we just printed with the Sprint Ray 3D printer. And the next step is we’re actually going to put it in our washer, and that uses water and alcohol to clean all of this excess material off like this. So this is our final night guard from Goochland Dentistry.. Come in and get yours today.
What makes you grind your teeth?
Hey, this is Dr. Peter Mechi gland Dentistry. I want to talk to you about grinding your teeth well. What makes you grind your teeth? I know for a lot of us, it’s messy kids’ room, getting your passwords entered into your computer correctly, or managing the photos on your phone. Believe me, those are some things that cause me to grind. There are many reasons we grind your teeth, and a lot of ’em are related to the frustrations of life. Some of them are stress and frustrations. The other thing that can happen is grinding can be caused by malaligned teeth, and there can also be problems with sleep apnea and airway problems when you sleep. Grinding affects your teeth in fast and slow ways. In a fast way, if you’re grinding, you can crack a tooth and usually that’s something you know right away. If you crack a tooth, if it’s slow, gradual grinding, the teeth over time gets shorter and shorter and shorter.
And this can affect your appearance and your smile. It can also end up with sensitivity on your teeth. You can have muscle pain and you can have pain in your jaw. Joint Question you have now is, will, can grinding be stopped? It’s difficult to completely stop grinding, but there are a couple of things we can do. One of the things we can do is typically we make a night guard, which protects the surfaces of your teeth from the damaging forces of grinding. Another thing we can do is we get you in touch with a sleep doctor so we can [00:01:30] identify if the grinding is related to your inability to sleep. And then the other thing you may want to do if you’re grinding during the day, set a alarm on your iPhone. Have it go off about every 57 minutes and just set a beeper. And if you’re working on that long email that you need to send, that beeper will go off and relax your jaw, kind of move your jaw, and that just breaks the cycle of your muscle. Thank you very much, Dr. Mur Ry.
Placing a crown on a dental implant abutment
Hey, this is Dr. Mechi Gu from Dentistry. I hope you’re well. One of the things we love to do, and we love to serve our patients is with dental implants. And I want to show you how once the implant is in place, how we actually put the teeth on the implants. So we’ve got these little set of a bunch of different screwdrivers. Every different implant system has a different size on their screwdriver, and we’re using an implant system that goes in right here. And what happens, this little thing’s called an abutment.
This is a screw. And what we do is we put the abutment on the implant, screw this in place with a little bit of, and then the crown goes over top, and then we fill that little, there’s a little hole in there. Right now we have not given this to our patient yet, but we’ll fill that with some filling material so you can’t see it. But this is called the crown. This part right here is called the abutment, and that’s the abutment and the screw go into the implant, which is this little green screw area there. So that’s called the dental implant crown and abutment.
Thank you.
Are you experiencing chewing pain?
Hey, this is Dr. Murchie at Gland Dentistry. I hope you’re doing well today. One of the things that a lot of people experience, they experience some pain when they’re chewing or biting, and it’s really uncomfortable. Typically, you bite into a nut or you bite in sometimes even a sandwich, and your tooth hurts, and then when you release, it gets worse. So what happens there is if your teeth are like this and then you bite on some food, they separate just a little bit, then they come back together, and then that coming back together makes the nerves on the tooth hurt. So how do we figure out which tooth is causing the problem? So a lot of times people with a cracked tooth will say, oh, all these teeth on my upper right are hurting. So we don’t really know exactly which one it is. So we’ve got this little thing called a tooth sleuth, and if you look, it’s got this little pointed area and the pointed area, we’re able to put right between the teeth, and then you close down on it, and then you open.
And if it hurts, then we know it’s that tooth. If we do it on this tooth and you don’t have any pain, then that tooth is not the one that’s bothering you. So the typical things that we do for a cracked tooth, one thing is we can adjust your bite. Another thing we can do is we do a small filling. Sometimes we need to do a crown, and there’s times where the tooth has fast but actually be removed. And a dental implant plant or a bridge needs to be replaced. So let us have know if that’s a concern to you. It’s something we treat all the time.